This site contains affiliate links, view the disclosure for more information.
Want to give your kitchen a facelift without undergoing a full-gut remodel? This is a step-by-step guide on how to paint your kitchen cabinets without breaking the bank, all while transforming the entire look and feel of your kitchen.
Getting ready to do any update to your home is an exciting feeling! It is so important to do your research first and make sure you have all your ducks in a row before starting any task. This guide will make painting your kitchen cabinets not only more enjoyable but extremely efficient.
You are going to learn all about how to paint your kitchen cabinets with ease with this helpful how-to-guide. Following these steps will lead to a beautiful outcome and a brand new kitchen on a budget. This post is all about how to paint your kitchen cabinets like a pro.
This post is all about how to paint your kitchen cabinets like a pro.
How-To Guide on Painting Your Kitchen Cabinets
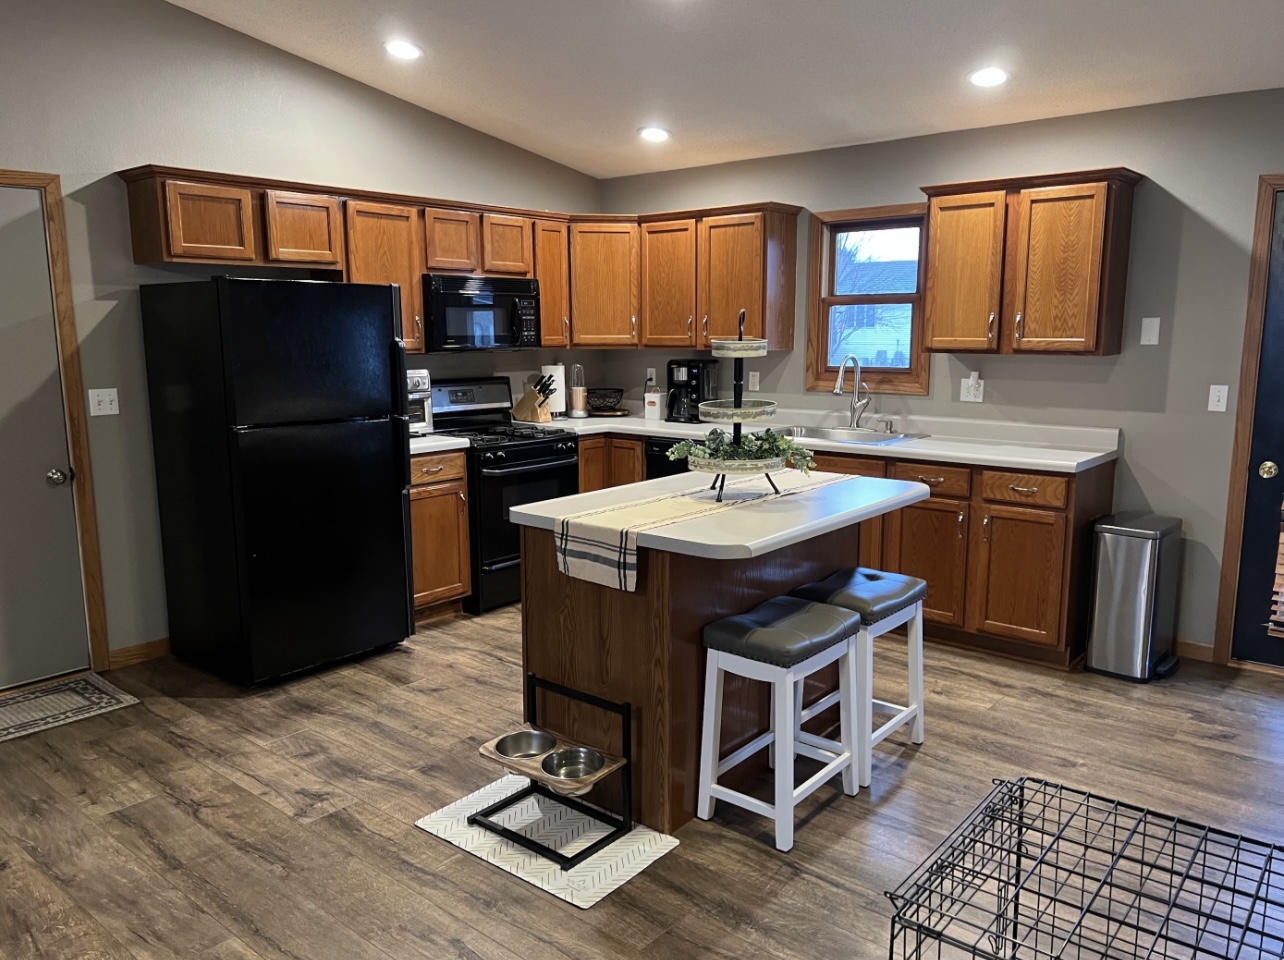
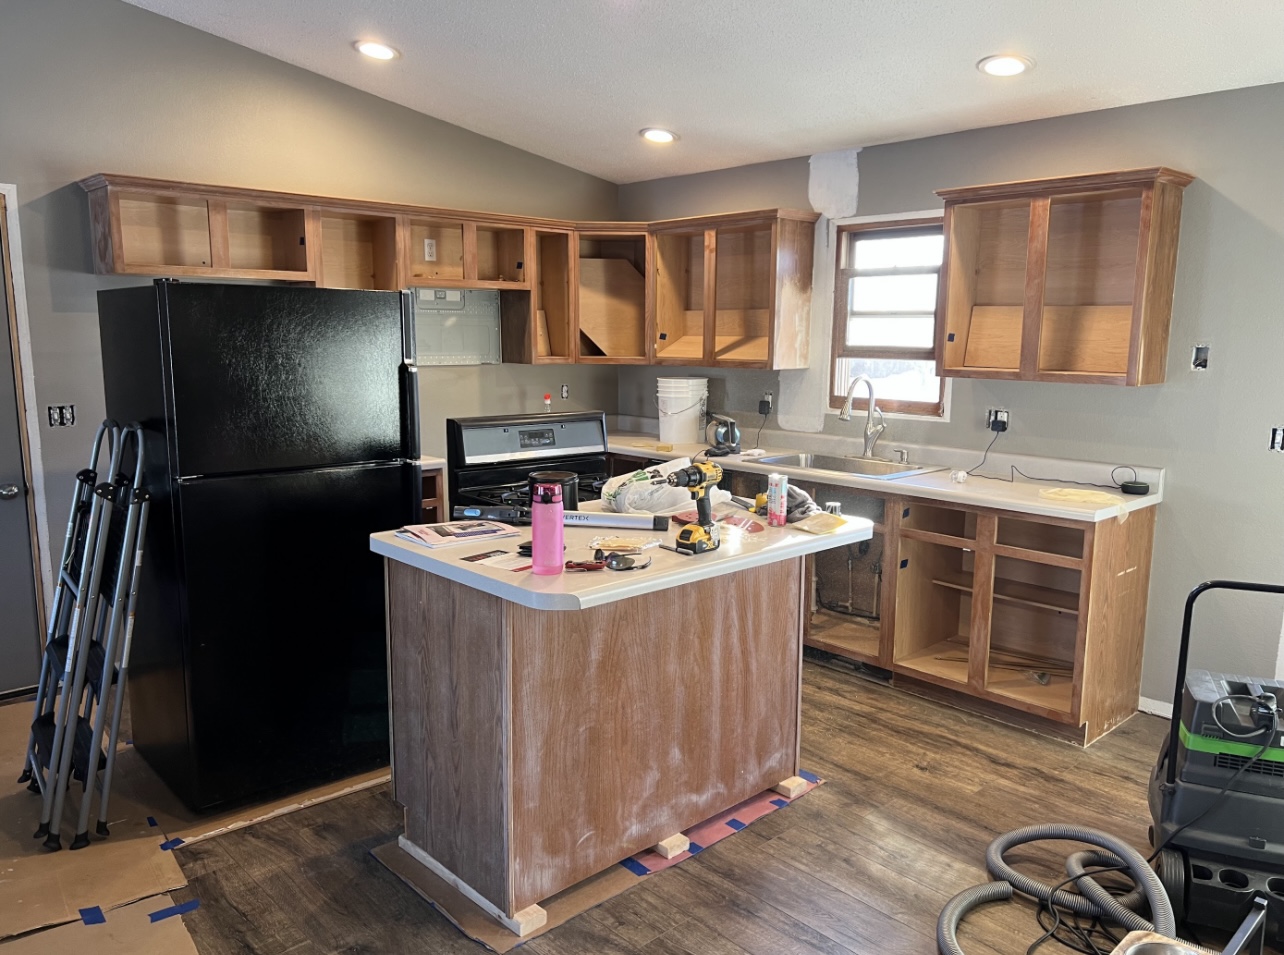
My husband and I live in a small ranch-style home that was built in 1996. There was golden oak trim and cabinetry E V E R Y W H E R E. Although I do love wood tones, I was sick of staring at the golden oak in every area of our home. Our home is small, and I felt that the golden oak was making our home feel dark. I wanted to brighten things up!
Painting kitchen cabinets is not for the faint of heart. It took so much time and at times it did feel like a chore, but we are SO happy with the final result!
This was a great way to change up the look of our kitchen, without replacing it with brand-new cabinets. And it was much cheaper to do it this way! Our cabinets were in pretty good shape, so it almost felt like a waste to rip them out and start over. This home is not our forever home, but I am a firm believer in loving the space you are in while you’re there.
With that being said, let’s dive into how to paint your kitchen cabinets!
Before you get started, you will need to collect all of the supplies needed in order to efficiently paint your kitchen cabinets. Here are the tools we used that I highly recommend you use. You will be able to click on these links to easily purchase everything you will need.
What you will need:
You can find and purchase any of these tools online on Amazon or at your local hardware store.
Let’s Get Started!
Choose Your Paint Color and Sheen Finish
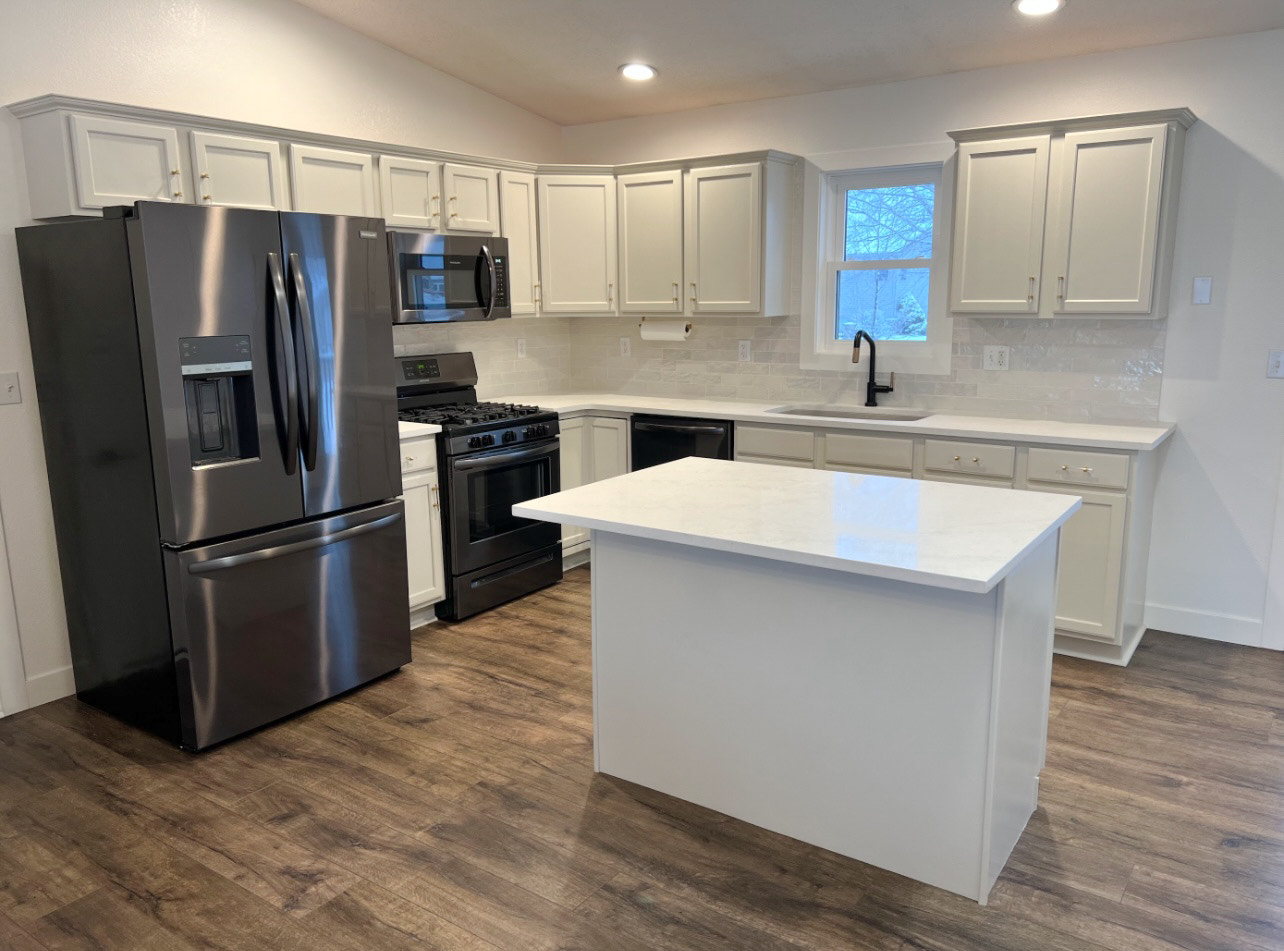
First, you need to choose your paint color and sheen finish. We knew we didn’t want white kitchen cabinets because we decided to paint all of our walls, interior doors, trim, and baseboard white. The paint color we chose for our walls, interior doors, trim, and baseboard was Benjamin Moore Simply White. It is such a pretty warm white! Since we didn’t want white cabinets, but we wanted to go lighter to brighten up our home, we went with a light creamy color which was Benjamin Moore Natural Cream. It is a beautiful light and warm cream that compliments the Benjamin Moore Simply White very nicely.
When it comes to choosing a paint sheen finish, I highly recommend using a semi-gloss finish. This is what we used for our kitchen cabinets. A semi-gloss finish will allow you to easily wipe off your kitchen cabinets if you get any food debris or dust on them. Also when choosing what type of paint and primer you want to use, be sure they are of high quality and consult with a paint expert to ensure you are choosing a paint and primer that are going to stand the test of time.
Prep Your Area
The next step is to prep your work area. This is honestly one of my most dreaded parts of any project, but it sets you up for success in the long run. My dad always taught me to have everything prepped and ready before beginning because it will help with the headaches and any cleanup at the end. The prepping takes the longest, but it is such a crucial step in the process and it is the key to success.
We painted our kitchen cabinets in the winter, so we set up shop in our basement to paint. First, we laid down drop cloths all over the floor. For this, we just used old bed sheets and tarps. Be careful if you just use old bed sheets for drop cloths because paint can sometimes seep through if some is spilled. I would make sure you double up on the drop cloths to ensure the paint does not seep through. You don’t want it getting on your floors! This happened to us a couple of times, but we were able to easily clean the paint off with a Scotch Brite pad.
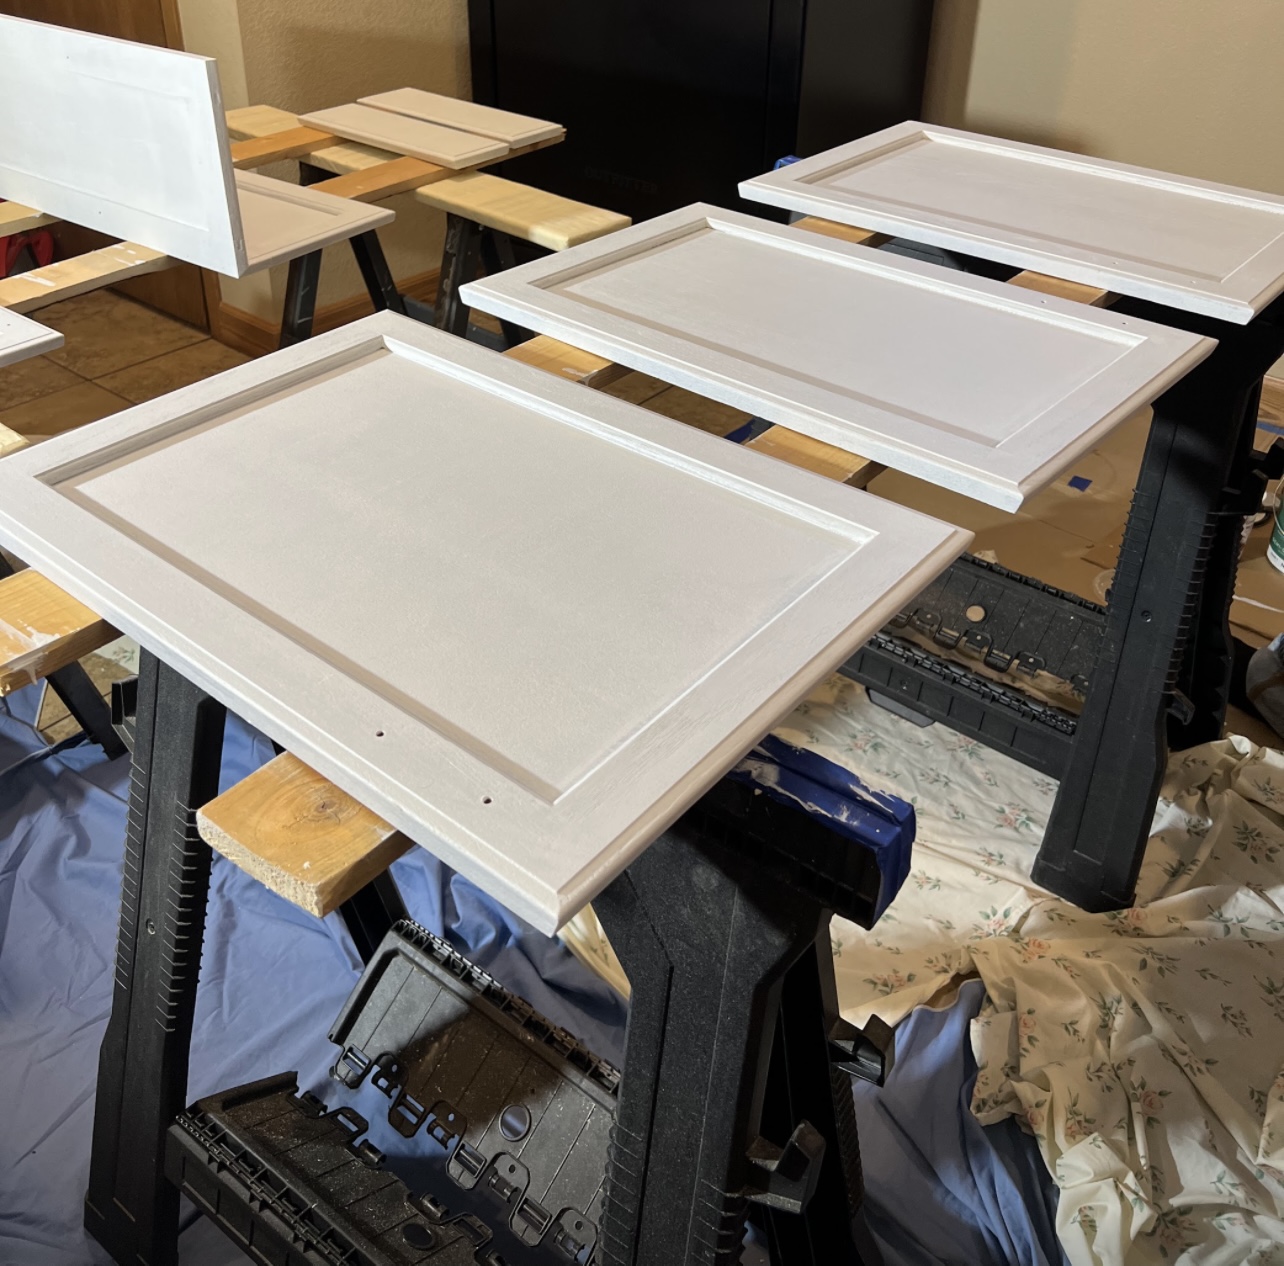
Then we set up sawhorses in 3 rows so we could lay the cabinet doors and drawers on these to paint. We also set up some long folding tables and taped paper to them, like what you would see in an art class, so we could lay the doors and drawers there that were drying while we rotated them with the ones we were painting. We also had a little station set up with our paint tray, brushes, and rollers so they were easily accessible.
PROCESS WORK
Prep Your Cabinet Doors and Drawers
Next, we need to prep all the doors and drawers. We removed all the doors and drawers from the shell of our kitchen cabinets. We cleaned this VERY well. This step is HUGE. You have to have a clean surface, otherwise, your primer will not stick and it will just cause a huge mess. Most likely peeling and chipping will occur, which would be terrible after you did all that hard work.
When we cleaned these, we had a station set up in our garage similar to the basement where we were able to lay all the doors and drawers out. You will want to use soap, water, and a wash rag to clean the doors and drawers and get all the gunk and build-up off of them. It’s gross how much gunk comes off of them! You just want to make sure any grease, dust, etc. are all off.
Sand Everything
Now you’re ready to do a light sand now that your kitchen cabinets are clean. And by light, I mean LIGHT. You do not want to over-sand your kitchen cabinets. You just need to scuff them up a bit for the primer to soak into the wood and allow for a good sealer. For this step, you will want to use a 100 to 150 grit sandpaper. You will want to take this and just lightly scuff up the wood, and make sure you get into all the nooks and crannies, especially if your door style has a lot of detail.
As you are sanding and scuffing up your kitchen cabinets, it is more than likely you will begin making a very dusty mess! I highly recommend having a shop vac on hand to help keep the dust under control. Be sure to use a new filter, one that is fresh and clean, around any wet paint. It would be AWFUL to have a dirty filter full of dust blowing out of your shop vac all over your freshly painted kitchen cabinets!
More Cleaning…
Now you will want to clean your cabinets again. But this time with a tack cloth. The tack cloth is very sticky, so I recommend wearing gloves when you do this part. The tack cloth will remove all the debris and dust from when you had sanded the doors and drawers. You will want to wipe the cabinets down quite a few times with the tack cloth until the tack cloth appears clean. You will be amazed by how much gunk comes off when you use them! Also, if you have access to an air compressor, it is beneficial to use one to blow the extra debris off the cabinetry before using a tack cloth. This is just another way to ensure you have a clean surface.
Prime Time!
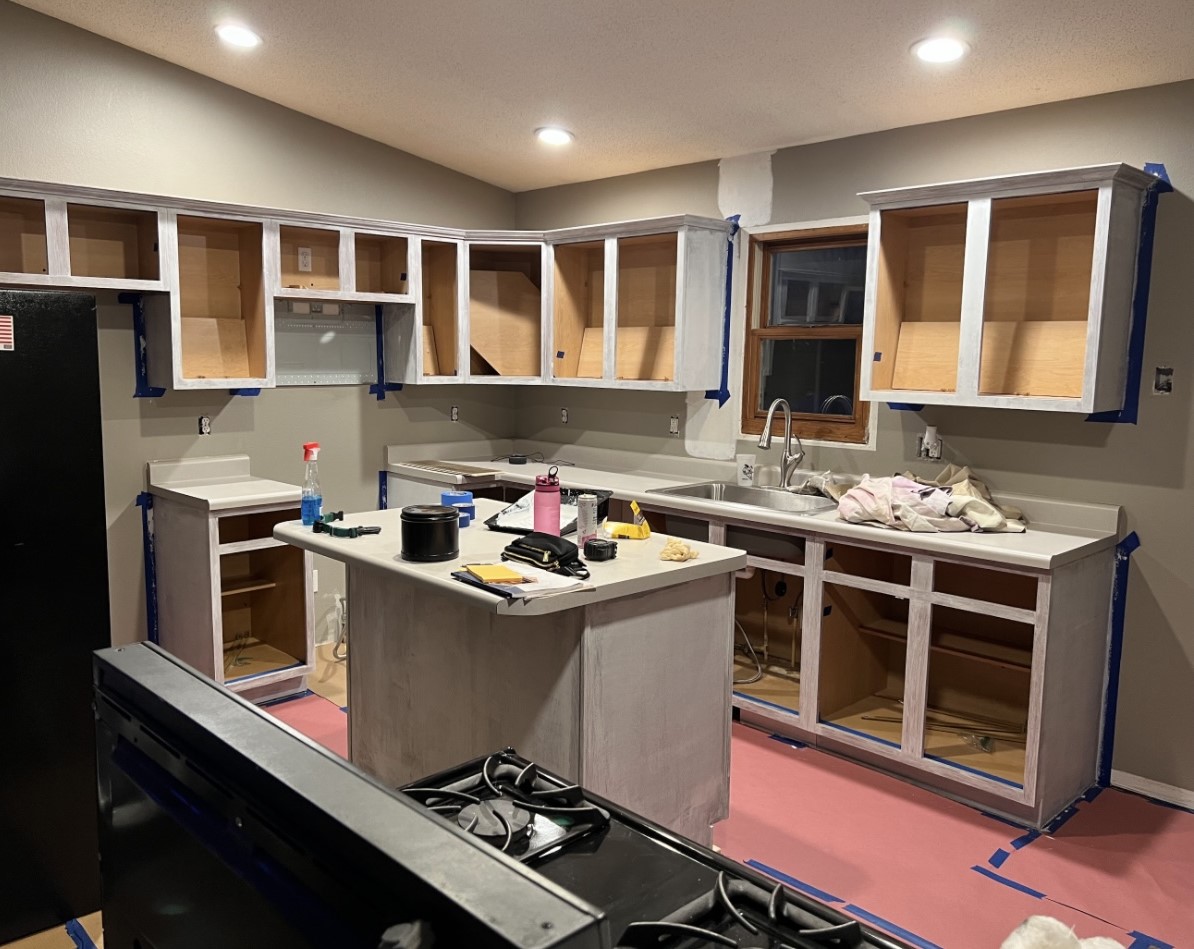
It is finally time to PRIME! You will want to do your research when it comes to finding the best primer. We used Benjamin Moore Stix and it was great. It dried quickly which allowed us to be able to prime a second coat almost immediately. You do want to read the paint can and follow the instructions it has for when you can apply a second coat. With primer, you do not need to apply a thick coat. You want the wood to be lightly covered.
The main goal with the primer is to have it soak into the wood so that when you apply your paint color, the paint color goes on smoothly and the color appears vibrant. We applied two layers of primer to the doors and drawers. My husband and I had a system for this. I rolled and he brushed. He would brush all the small areas and detailed parts on the doors and drawers and then I would run over them with my mini roller for a smooth look.
Other Tips
You will want to use a 3/8″ nap roller cover. The size of the nap is so important because this will not only determine how the paint will adhere to the surface, but also determine how the finished look of your paint job with turn out. Also, when choosing what type of paint brush to use, I recommend a high quality paint brush like the Purdy brand. They are a high quality paint supply company and we use many of their products.
Make sure you mix your paint and primer very well. You can use a stir stick, but I prefer to use a paint stirrer that attaches to a drill. This will ensure your paint and primer go on smooth, even, and consistent.
Also, be sure to use paint tray liners and not overfill the paint tray with primer or paint. Having too much primer or paint on your paint roller cover isn’t good and it can lead to a very unprofessional look. You also want to be sure that you have enough on the paint roller, because if you don’t have enough paint on the roller, you will notice a lot of “skipping” on your painted surface which looks very uneven. There is a happy medium to how much paint should be on your roller. You want enough to cover the roller, but not too much where it is dripping in paint or primer.
It’s Finally Time To Paint!
Once the primer is dry, you are ready for the fun part…PAINTING! Finally, you are here. You can see the light at the end of the tunnel. With the paint, we basically repeated the steps above as we did with the primer, but we were more detailed with this and took our time here. Make sure these sit and dry for a couple of weeks before touching them or even thinking about hanging them because the paint is going to be very tacky and you do not want the paint peeling off after all your hard work! Also, be sure to paint the actual cabinets themselves. For this, just repeat all of the above steps and you will be all set. Just make sure you lay your drop cloths and tape all around your cabinets with blue painters tape, so you do not get any paint on your floor, walls, or appliances!
Clean Up, Clean Up, Everybody Clean Up!
Another tip I have for you is to make sure you are always cleaning your paint brushes and paint rollers thoroughly before and after use. I recommend this especially with brand new roller covers, because a lot of times they will have extra lint on them. This isn’t good, because the lint can get into your primer and paint and leave little lint dots all over the surface you are painting. When I clean the roller covers before use, I just run them under water for a little while and then with my hand remove any excess water and let it dry. This is key to ensure you have a nice paint job!
When it comes to cleaning your paint brushes, I recommend using a paint brush spinner. All you do is attach the bottom of the handle of the paint brush to the little clip on the paint brush spinner, get the paint brush wet with some dawn dish soap, and use the spinner to spin the paint brush. This will make cleaning your paint brushes so much faster and effortless.
A little tool that I use to help me clean the roller covers after I have used them is a putty knife. This thing is amazing! It’s not only great for cleaning the paint out of a roller cover, but it is great for so many other things. Trust me, this is worth the buy and it will save you so much time!
You’re Done! Now On To The Details…
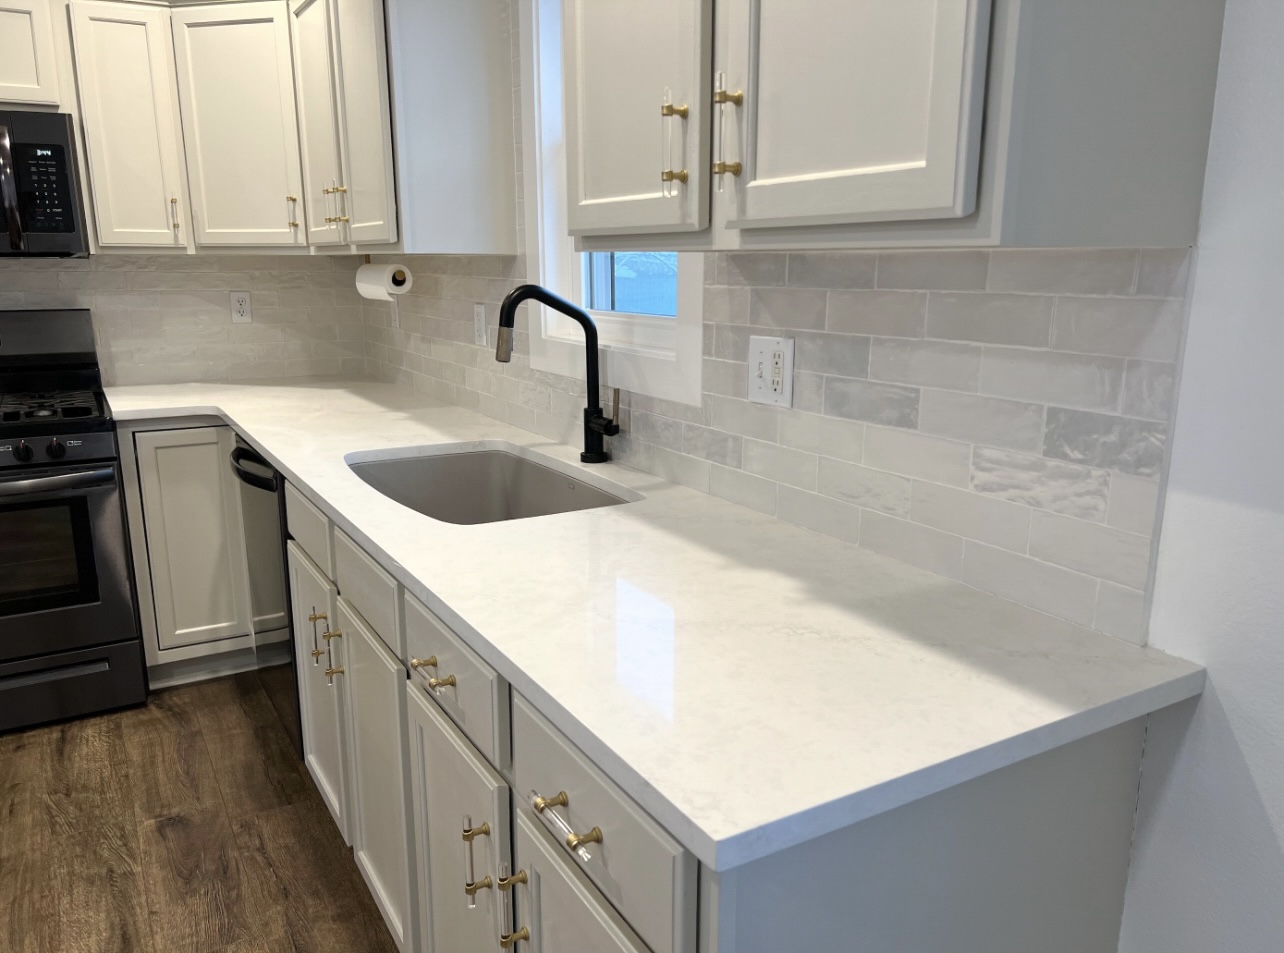
You made it! It’s time to hang all your doors and place your drawers. Before placing all your doors and drawers back into their proper homes, be sure that they are fully dry along with the cabinets themselves. If the paint feels too sticky and tacky, you will want to wait befoYou will most likely want to update your cabinet hardware to match your beautiful freshly painted cabinets! We found our hardware on Amazon, but I would highly recommend getting hardware from CB2, Rejuvenation, Top Knobs, etc. for heavier more durable hardware.
Have fun with this! Cabinet hardware is the jewelry of the kitchen. It might seem like a small detail, but that’s what packs a punch. It’s literally all in the details with everything you do when it comes to designing! We just kept the holes in the cabinets from the previous hardware, so we had to go with that size pull. But if you wanted, you could easily fill the holes and re-drill them to fit whatever hardware size you would like. If you decide to do this, make sure you fill the holes and drill the new holes when you are in the sanding stage of the process.
Enjoy All Your Hard Work!
It’s finally time to sit back, relax, and enjoy your freshly painted kitchen! Pat yourself on the back. All your hard work is done and it’s time to admire your work. As I mentioned above, it is not for the faint of heart, but it is SO worth it in the long run! We did end up updating our kitchen countertops to quartz from laminate and we added a kitchen tile backsplash to tie everything together. Everyone who comes over to our house cannot believe it is the same kitchen! And to be honest, we can’t either!
Good luck and happy painting!